RSS
 

Yooperlite Hunting

02 Oct
By Dena Nechkash
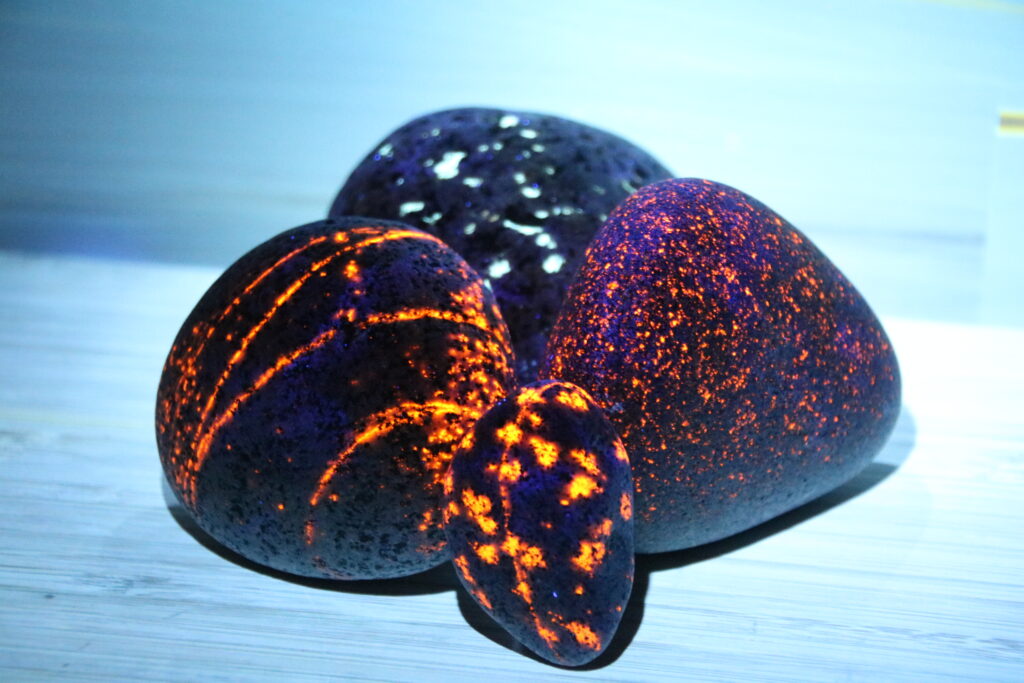
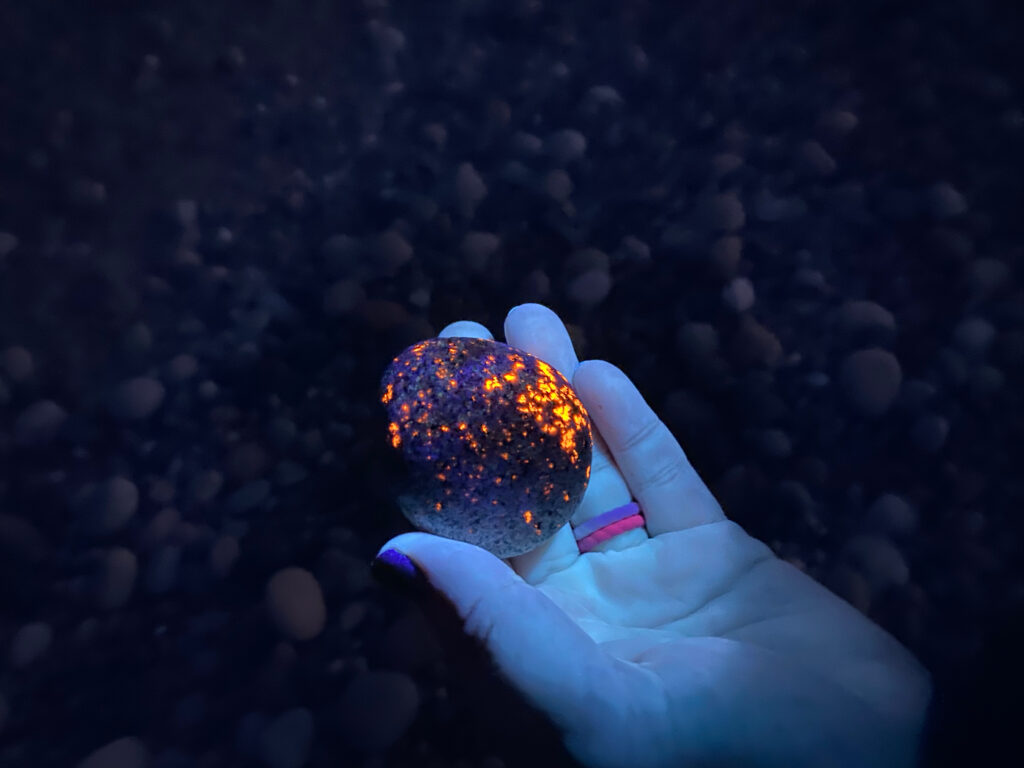
A yooperlite found on the shores of Lake Superior, August 2021.

It is almost magical scanning the rocky beaches of Lake Superior in the dark, hoping to find a spark of vibrant orange flashing under the UV light. With the waves lapping the shoreline in a calming rhythm, it is a relaxing hide-and-seek game set in one of the most beautiful regions of the United States. Once you find that first one, you will want to keep hunting for more! 

My husband and I spent two weekends hunting for yooperlites in Michigan’s upper peninsula this summer and had a lot of success! It is very easy to do, but we came across many people who seemed to have trouble finding them or only found one. If armed with the right tools and knowledge, you too can successfully yooperlite hunt in Michigan! 

What is a yooperlite?

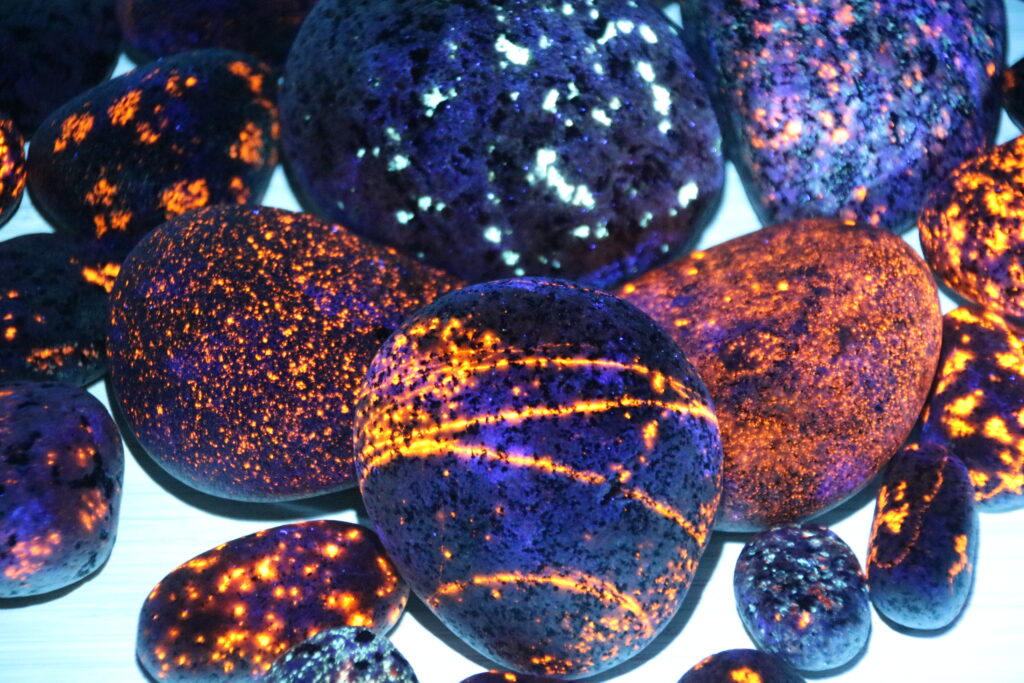
Yooperlites glow in a variety of patterns and colors, as demonstrated here.

Yooperlites are fluorescent sodalite-rich syenite rocks first discovered in 2017 by Erik Rintamaki of Michigan. The sodalite glows bright orange, similar to red-hot molten lava in a volcanic rock, when flashed with long wave ultraviolet light. While most commonly found on the shores of Lake Superior, they have been found on Lake Michigan’s shores, in gravel pits and even in Tennessee due to glacial movement. They are a fairly new discovery and thus a very popular family activity during the recent social distancing recommendations. 

How do you find them?

Yooperlites are found on the shores of Lake Superior (among other places, such as Minnesota and Wisconsin) by scanning the rocky Great Lakes shores with a powerful UV (black) light. We found great success with our Alonefire brand light – a budget-friendly high powered black light – with specs of 10 watt, 365 nm. It uses rechargeable 18650 Li-ion batteries, which we would go through approximately one an hour. We saw a wide variety of lights being used, some with better luck than others. We also would continue to hunt where others had just been and still found yooperlites. Whether that was due to the differences in equipment, the shuffling of feet bringing new rocks to the surface or just pure luck, we weren’t really sure. 
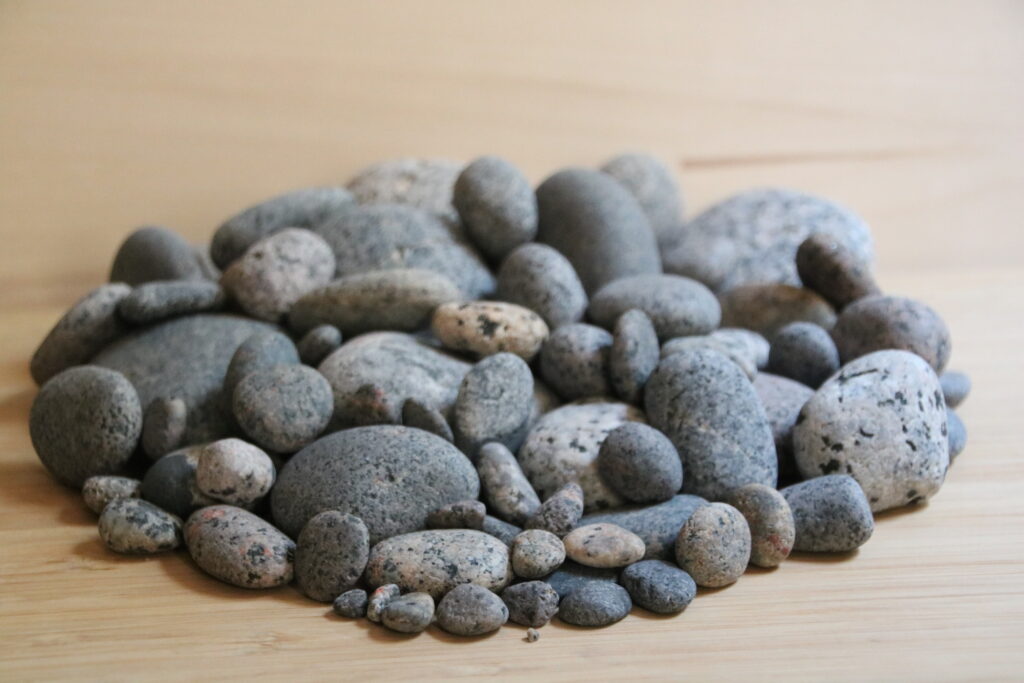
Would you be able to pick out a yooperlite in daylight? Probably not. All of these are yooperlites. They don’t have one color, size or texture. They are all a little different.

I recommend also purchasing yellow UVA 400 safety glasses to protect your eyes. Long exposure to these high-powered UV lights is not healthy for your vision. We didn’t see anyone else wearing protective eyewear, but it was a risk we weren’t taking, and the glasses really weren’t that expensive for providing peace of mind. 

There are a few techniques you can use to scan the beaches with your UV light: side-to-side sweeping motion or the figure-8 motion. Try them both and decide what works best for you. I ended up switching it up based on obstacles and terrain. The sweeping motion from side-to-side seemed to work well for shorelines with an even scattering of rocks, while the figure-8 method worked better for the piles of rocks. The goal is to slowly scan the beach a few feet in front of you and quickly assess if the items that light up are a yooperlite or something else. 

You will have many different objects catch the UV light and glow. Fossils usually glow bright white. Feathers and bird poop are usually a blue glow. Some brown and white stones reflect the UV light, too, but it is pretty easy to tell that they aren’t what you’re looking for. There are some algae-covered rocks that glow red or deep orange, but they are pretty easy to differentiate from yooperlites and their glow dies as soon as they dry. The yooperlites are a very brilliant orange, almost like flames covering the rock. Some yooperlites have also been found with a white or pale blue color that glows instead of the orange. 

The yooperlites can be a variety of sizes. We found them as large as a mango and as small as a pinhead. Scan the dry sand further up the beach as it is often ignored. Most of the popular beaches are hunted almost every single day, but new yooperlites wash up regularly, so be sure to check the wet sand areas well. Also scan in the shallow water and see if any are near the shore. We did find several close to shore, too! 

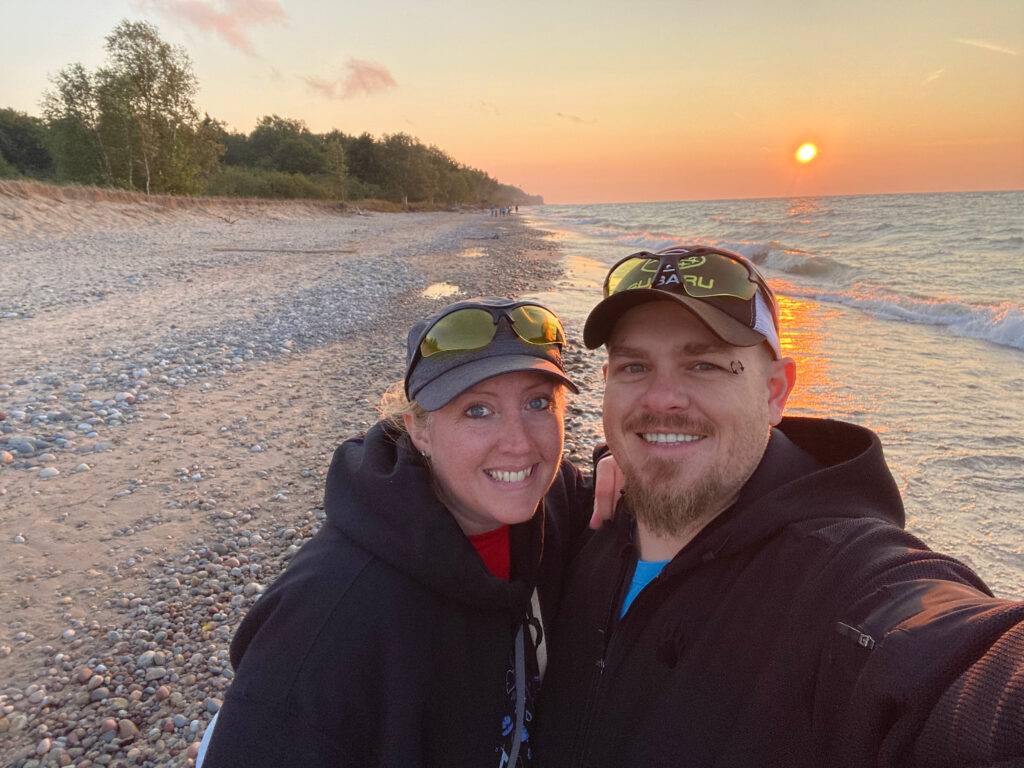
Waiting for the sun to set so we can hunt some yoopelites!

Please, please, please abide by all posted signs and only hunt via access through public property. Do not trespass on private property to access the lakeshore. Do not ruin this hunting experience for future hunters. There are plenty of public access points, such as Grand Marais (do not hunt on the Pictured Rocks National Lakeshore), Lake Superior State Forest Campground, Muskallonge Lake State Park, Two Hearted River State Forest Campground, Crisp Point Light House, Vermillion Point Nature Preserve and Whitefish Point Light Station, to name a few. I haven’t hunted on the Keweenaw Peninsula yet, but there are some public beaches known for yooperlites there, too. 

When you are choosing which beach to try, keep in mind that not all beaches are accessible by paved road. And the rough dirt roads are a challenge for all-wheel-drive vehicles, especially in the rain, which happens a lot up there. If you get stuck on one of the dirt roads, you won’t have cell phone service to call for help and when help arrives, it is very costly because of the conditions and the time it takes to get there. Make good decisions about your destination. Having an atlas of Michigan helps, too, in case you need directions and can’t connect to the internet. It saved us more than once! 

Also, please know that Michigan limits the amount of rocks you can harvest in a year to 25 pounds per person. Please respect this and only keep up to 25 pounds of rocks in Michigan in one year. Don’t worry, it takes a LOT of rocks to add up to 25 pounds!

Tips & Tricks
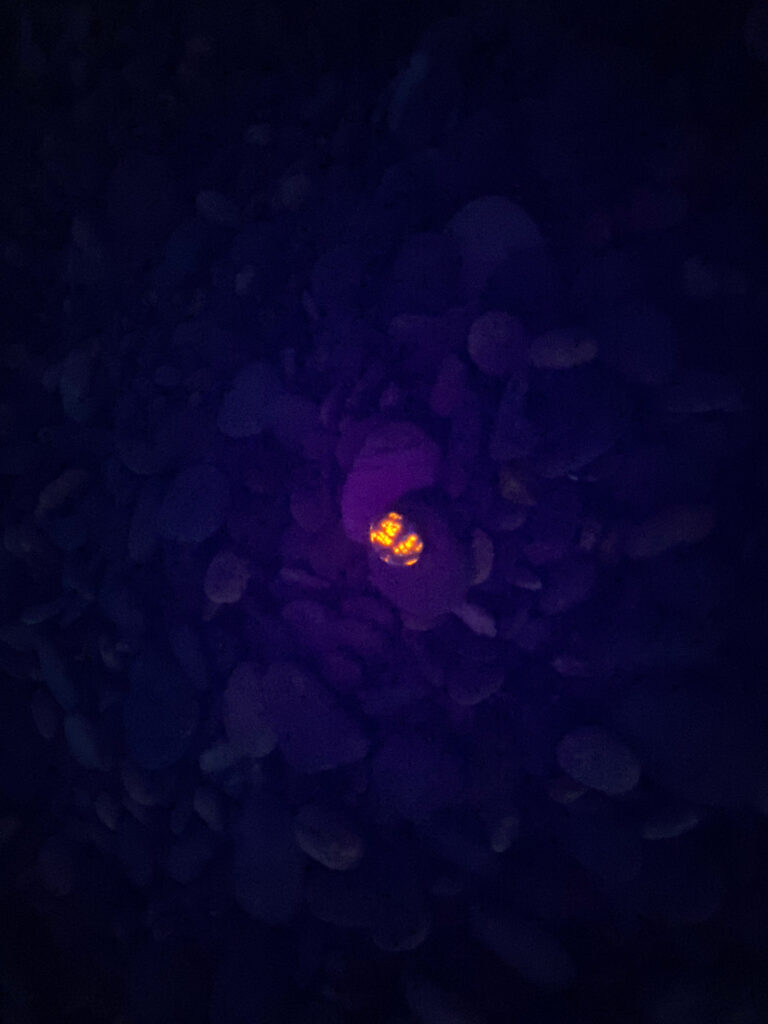
I spy a yooperlite!!! They really glow this brightly while sweeping the shoreline with a UV light. It’s a glow-in-the-dark rock hunting game!
  • Use the correct equipment. 
    • UV light
    • Yellow protective glasses
    • Rock collecting bag
  • Dress comfortably for a walk on a rocky beach at night. 
    • Wear layers, it can get chilly at the water edge. 
    • Wear non-slip sandals or rain boots. Plan to get your legs wet. 
  • Check the forecast before heading out. Do not continue to hunt during a storm. 
  • Scope out the beach in daylight to know the terrain and plan for the equipment you may need. 
  • Get there early! It’s become a very popular activity and the beaches are all filling up with hunters at sunset. 
  • Avoid crowded beaches or walk a distance from the parking area to find an untouched area to hunt for the best success. We found that walking to a distant part of the beach at sunset and then waiting until it is dark enough to walk back gave us an advantage. 
  • Leave a glow stick at the entrance to the beach so you can find your way back. Please take the glow stick with you when you leave! 
  • Bring a backpack for your supplies, like water. And actually DRINK water while hunting. 
  • Consider having a separate rock hunting bag (I use a modified lingerie wash bag, which I added a crossbody strap to; my husband has one with a carabiner clip added). 
  • If you plan to dig in the rocks, bring gardening trowel or small rake to help. 
  • Keep your UV light moving, sweeping the beach. 
  • Secure your light to your wrist so it doesn’t fall into the water. 
  • Search all parts of the beach: dry sand, wet sand, shallow water.
  • Avoid obstacles like fallen trees or large boulders by turning on your flash light occasionally to check the terrain ahead of you. 
  • Give your eyes time to adjust to the UV light. It will seem very dim at first. 
  • When you pick up the yooperlite, give the rocks around it a shuffle. Sometimes there are others nearby. 
  • Watch behind you. Sometimes your footsteps uncover yooperlites. 
  • Take it slow. You’ll see lots of other things glow in the UV light, but you’ll know when you found a true yooperlite. 
  • Visit the beaches after big storms for better hunting. The big waves wash up more of the yooperlites. 
Try to find your own yooperlites.

Packing Checklist

  • UV light
  • Protective glasses
  • Drinking water
  • Rock collecting bag with small holes to let the sand fall through
  • Fast-dry clothing
  • Water shoes or rain boots
  • Backpack
  • Bug spray
  • Headlamp or flash light
  • Towel (for cleaning up when get to the car)
  • Bag for sandy shoes (also for at the car)
  • Extra shoes (who wants to drive in sandy shoes?)
  • Friend – because two sets of eyes are better than one!
  • Optional, based on the weather: rain jacket, stocking cap, gloves

While yooperlite hunting is strictly a night activity, there is a lot to see and do in Michigan’s Upper Peninsula during the day, too, including museums, lighthouses, waterfalls, state parks, national lakeshores, agate and fossil hunting, hiking or biking, scenic drives or just relaxing on the beach. We were able to cram quite a bit into our two weekends up there. We made it to Grand Marais Light House, Tahquamenon Falls State Park, Crisp Point Light House, Muskallonge Lake State Park, Whitefish Point Light Station, Two Hearted River State Forest, Curley Lewis Memorial Highway Scenic Drive, Point Iroquois Light House, Soo Locks, and Vermillion Point Nature Preserve. 

This was actually our third trip to the U.P. this year! We made the trek to Munising and Marquette in winter to ice hike and check out the frozen waterfalls. They were spectacular! ANd we were able to get some great pictures because not many people venture out in the cold. You’ll have to fight the snowmobilers for hotel rooms, though! 

NOTE: I am not affiliated with any of the companies or products I recommend in this article. I am simply sharing specifics that I personally have experience with. 
 
Comments Off on Yooperlite Hunting

Posted in General Travel, Nationwide, Uncategorized


Seize the Day

18 Mar

Escape


Invest in Exploring

29 Aug

Invest in travel.

Invest in travel.


Geocaching: A Modern Day Treasure Hunt

29 Apr

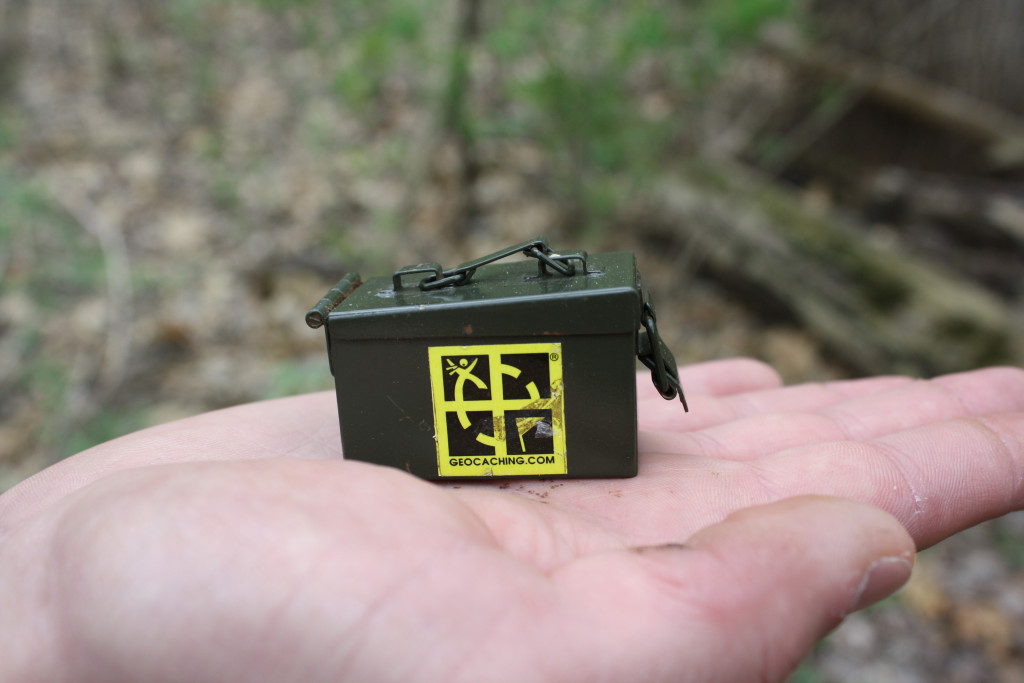
Geocaching may seem like a foreign word, but to many it means a modern day treasure hunt game. And, the best part is, it can likely be found in your hometown.

A small version of a geocache.

A small version of a geocache.

Using GPS coordinates and a website dedicated to the activity (geocaching.com), you can track down containers of varying sizes on public property. These containers can be as big as a larger ammo container and as small as the head of a bolt. The website tells you which size of container you should be looking for. Inside, the container will always have a piece of paper and, when you find the container, you should sign that you found it. Some of the larger geocaches will have trinkets inside called swag. If you want to take something from the geocache, just leave a different item in its place.

Geocaching is intended to get people outdoors, exploring nature and sharing the beauty and history they find. Many of the caches are located at historical markers, state parks and naturally beautiful locations. It is important that seekers take care of the property the cache is on and remove all litter as well as try to avoid making a path. Only those with the coordinates should be able to find the geocache in order to keep it hidden from others who may remove or damage the container.

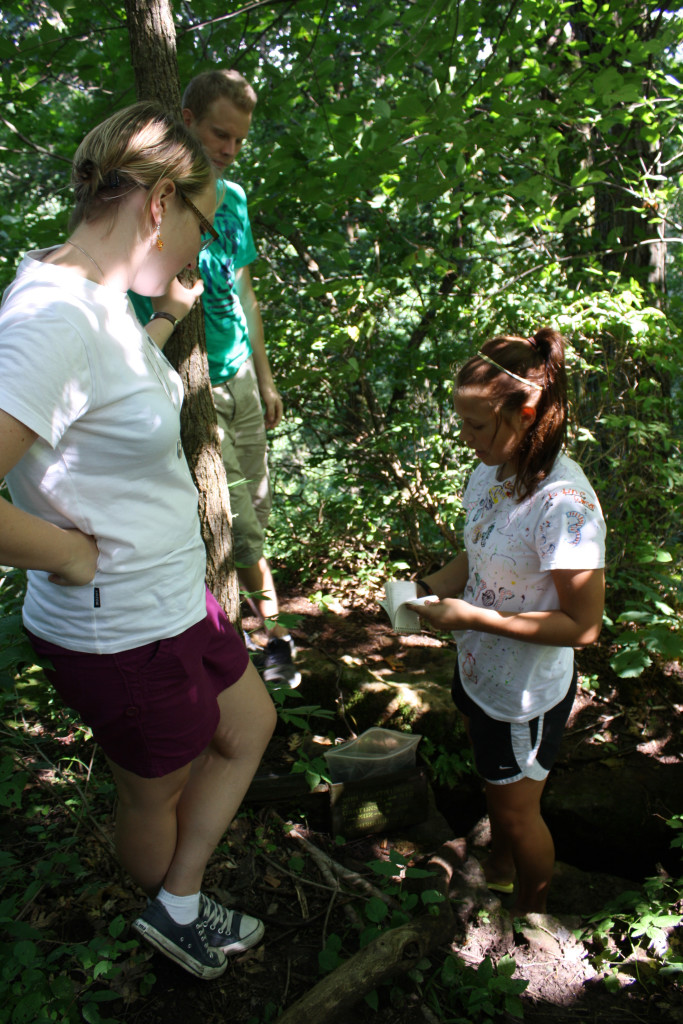
Geocaching at Governor Dodge State Park in Wisconsin with friends from Germany.

Geocaching at Governor Dodge State Park in Wisconsin with friends from Germany.

Remember, some of the caches are very creatively hidden, whether it’s a good location or a different type of container. It may be a challenge to find it. Bringing a friend along helps; two sets of eyes looking makes the task easier and makes it more of a game.

Geocaching is appropriate for all ages. Caches are not supposed to have any vulgar content. If you find any, report it to the cache owner. There are millions of geocaches worldwide and probably a couple of hundred within 50 miles of you at any time.

Geocaching is a fun group activity. You can race to see who can find more, or you can stop and enjoy the view. The important part is to get outside and explore.

For the history behind the activity, go to https://www.geocaching.com/about/history.aspx.

How To

  1. Go to geocaching.com.
  2. Create an account and/or log in. Note, there is a one-time $10 fee to get the geocaching ap on your phone or mobile device.
  3. Click the “Play” tab and click “Find a Geocache.”
  4. Type in a zip code or city name, or click “find nearby caches.”
  5. When the results come up, click “Map these Geocaches.”
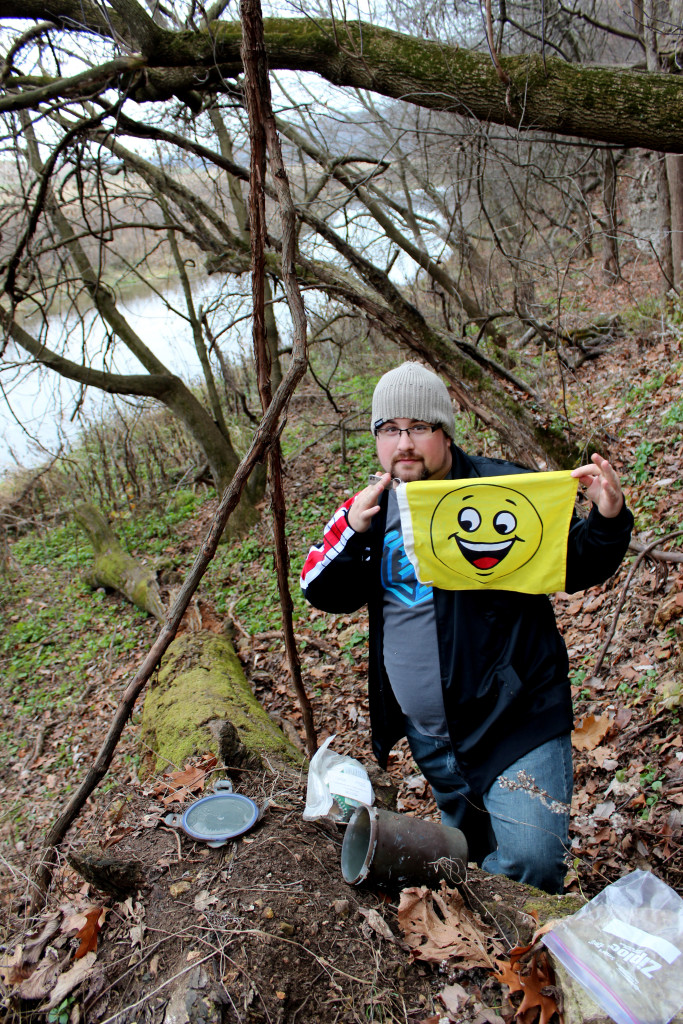
  6. There will be several different symbols that are shown in your search. The green boxes are typical geocaches with a simple format to find them (enter one set of coordinates and it will lead you to the container). The yellow boxes are multi-caches which require several coordinates to discover the container (you find a container with instructions at the first set of coordinates and then either solve a puzzle or follow the coordinates given at that container to find the next one. There may be many containers to find to get one log to sign.) If you’re lucky enough to have a yellow smiling face, that means you’ve already found that cache. There are other uncommon symbols that are further explained on the website.
  7. Click the symbol for the cache you want to find. It comes up with a small description box. If it’s the one you want (sometimes they’re close together and it is difficult to choose the exact one you wanted), click the link on the name of the cache and it will open another page with much more information. Read through it, but make sure you notice the difficulty, terrain and size of the cache, all of which is located at the top of the page. Read through the instructions and get a better idea of what you’re looking for. Some caches have a lengthy article about the history of the area or instructions for finding the container; others are simply “Good luck and have fun!”
  8. At this point, instructions may vary depending on how you’re viewing the geocache. On a computer, you can copy down the coordinates and type them into your handheld GPS device. From your phone or iPad, there should be an option to “Navigate” to the cache and you can switch back and forth between the compass and map option.
  9. When you find the cache, write your log-in name on the sheet inside the cache, then go to the website and log that you found it. You must do both for it to officially count on the website. The cache owner can check the paper log and compare it with the website and remove those who haven’t logged both. Most will use the letters TFTC to mean “Thanks For The Cache” if they enjoyed finding it. You can leave a longer message, too. Try not to leave any information that will make it too easy for the next person to find. If you were unable to find the cache, but feel that you were in the right place and it just wasn’t there, you can log that you didn’t find it. Sometimes several people unable to find a cache means that the owner will need to determine if it is still there or if it has been stolen or damaged.

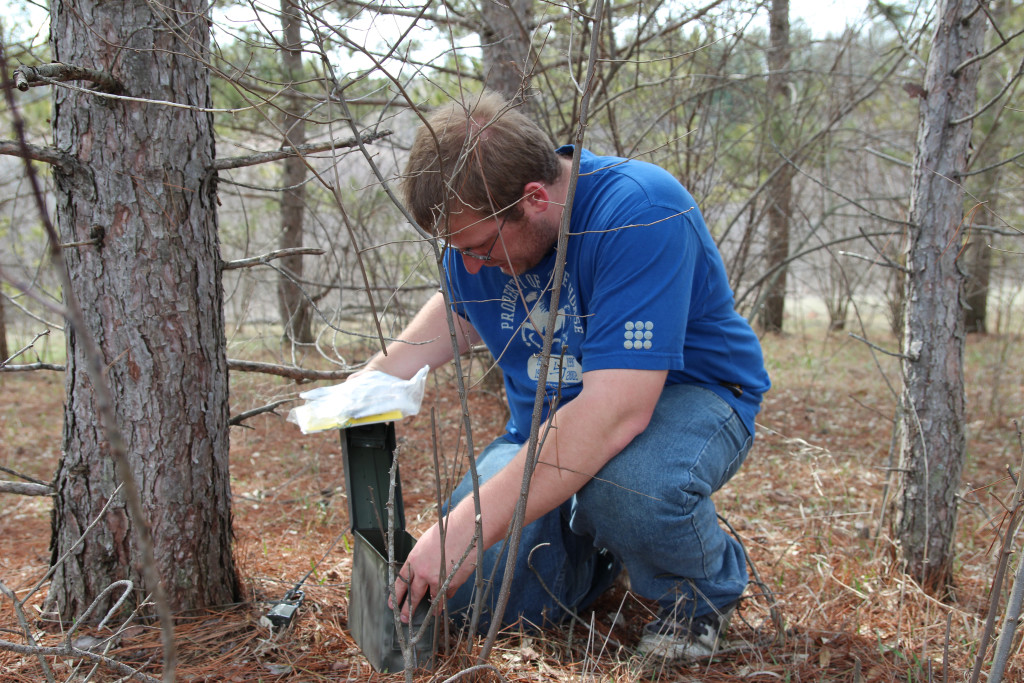
Geocaching in Illinois with Brandon.

Geocaching in Illinois with Brandon.

Tips/Tricks

-It’s always a good idea to bring a pen or pencil with you.  Many of the caches contain writing utensils, but weather takes a toll on their functionality. The smaller caches don’t typically have space for a writing utensil.

Geocaching in Wisconsin with Richard.

Geocaching in Wisconsin with Richard.

-Wear long pants and comfortable shoes. There will be some walking and many of the caches are off the beaten path.

-The caches are hidden, not buried, so digging should not be necessary.

-Don’t go for the obvious spot. Once in a while it will be that easy, but most of the time it is a little more challenging to find.

-Take a backpack with you on longer hikes; this allows your hands to be free to search all surfaces and you’re able to bring water and other supplies.

-Follow all posted signs. If a park wants you to stay on the path, do so as long as possible. If a sign says no trespassing, there must be another way to get to the container and you should not go on private land to access it.


Grand Bahama Island-Garden

24 Feb

Note: This blog post is the last of four about a visit to Grand Bahamas Island in January 2016.

I wanted to get out of bed for the last sunrise of our stay on the island. I let Corey sleep since his leg and back had been bothering him, especially when walking on the sand. We hadn’t really had much time to walk the beach our resort was on, something I really enjoyed doing every day, sometimes twice a day, the last time I visited.

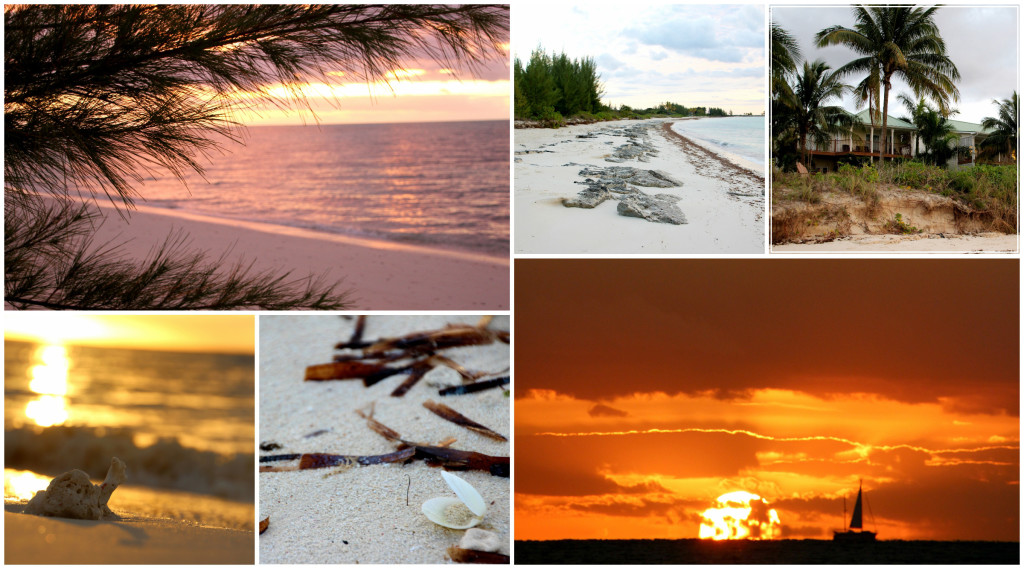
I walked east, since I knew the beach was longer that way, and found myself collecting shells even though I already packed my bags for our flight later in the day. Some shells were just too pretty to pass up. There were plenty of people out walking the beach, but most didn’t make it too far past the resort. I went all the way to the end, a couple of miles I would guess. I was able to capture some beautiful shots of the vivid sunlight meeting the waves and a sailboat passing through at just the right moment. It was serene.

The sunrise on the day we left was absolutely worth the early-morning wake-up.

The sunrise on the day we left was absolutely worth the early-morning wake-up.

Of course, the calm was washed away when I realized how long I had been out walking and how long it would likely take me to get back to the resort, putting me (actually us) way behind schedule. Corey was barely awake when I got back, so I didn’t feel too bad about my lengthy solo adventure.

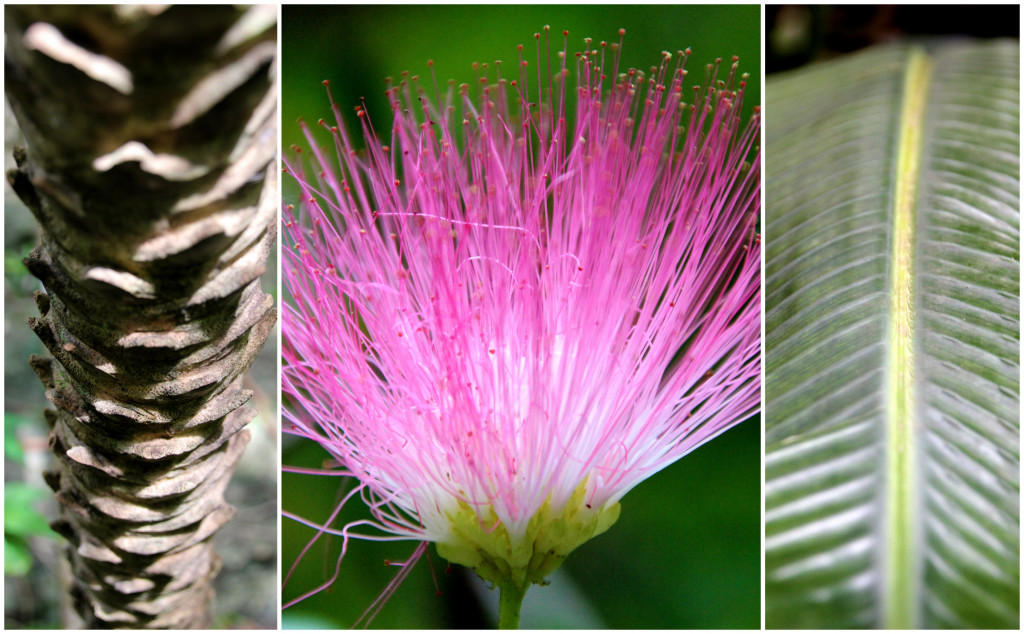
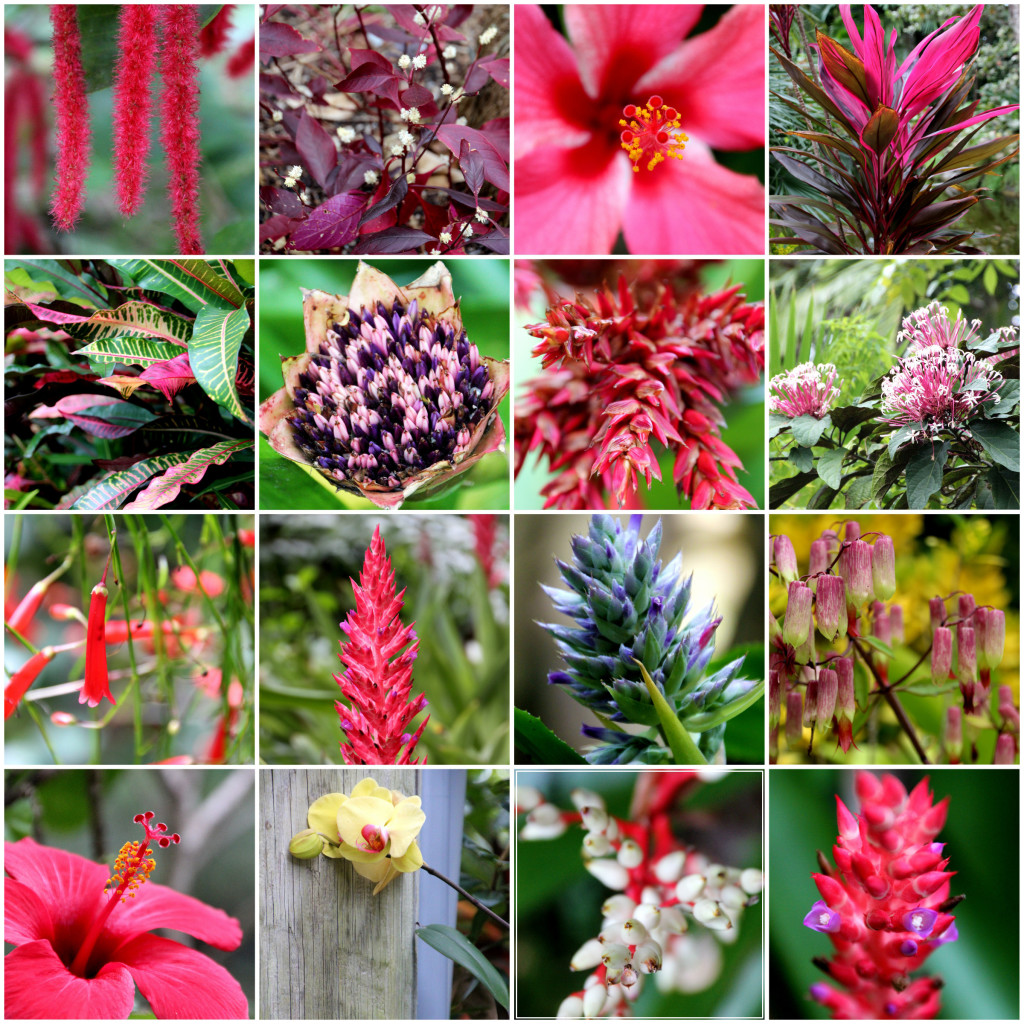
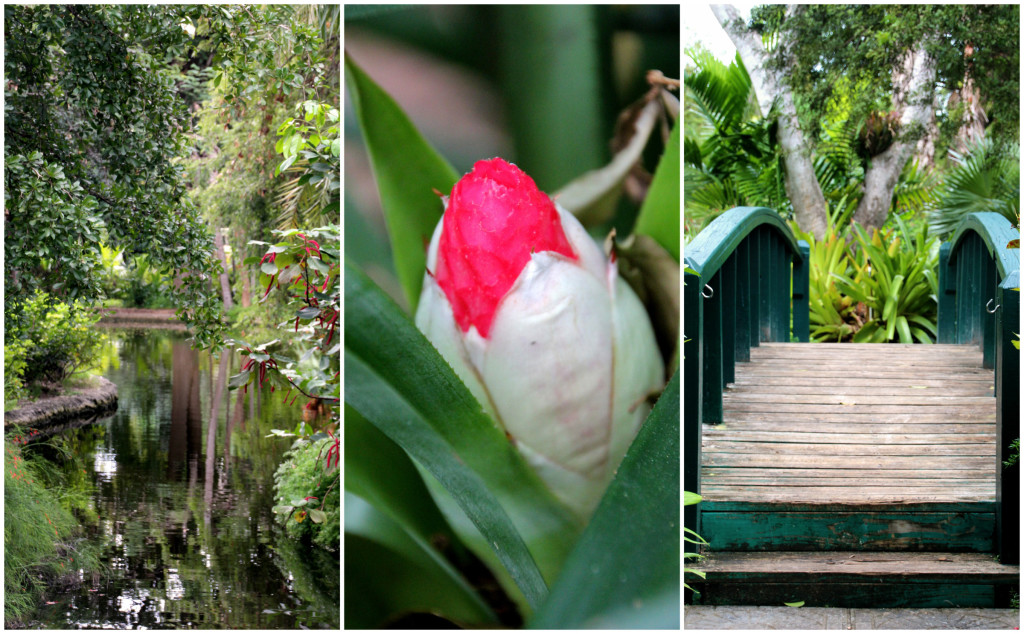
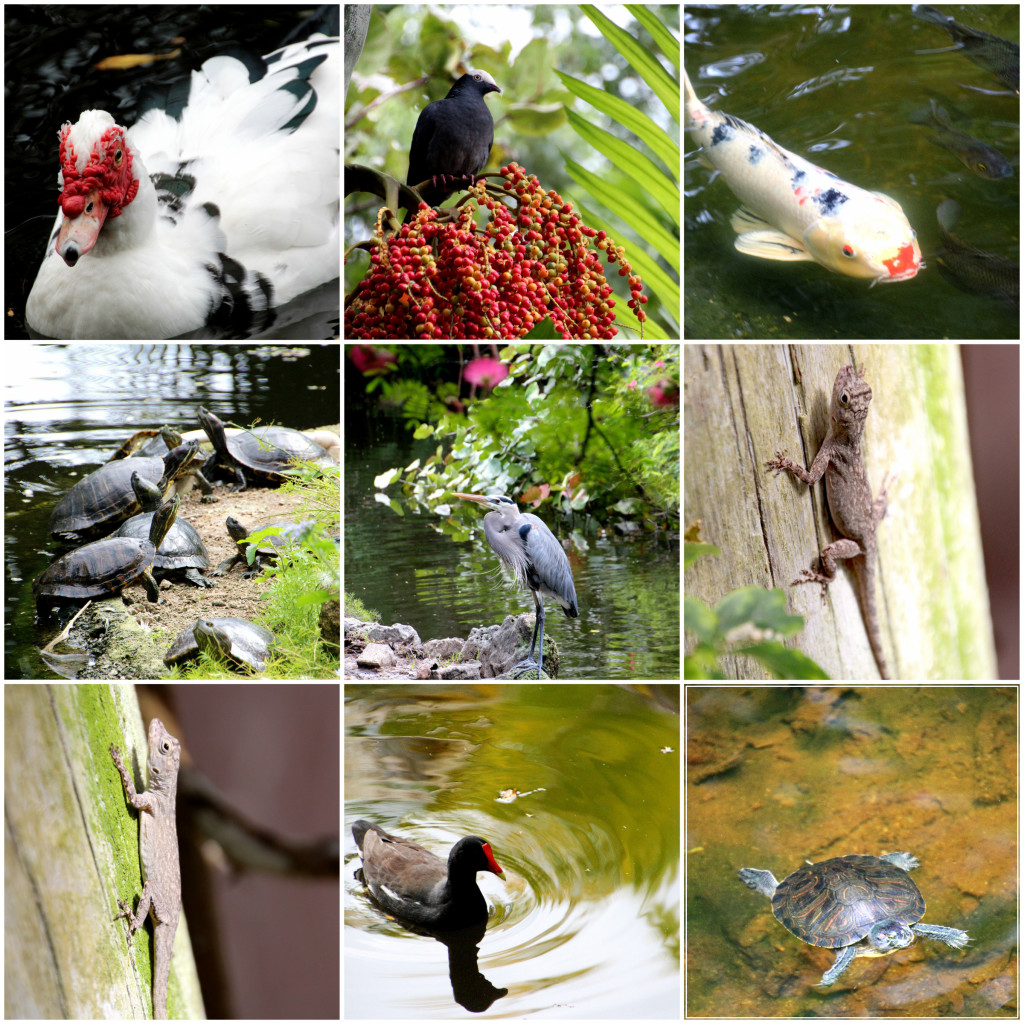
We still had the car for a few hours, so we made the most of our time and drove to Garden of the Groves. It was probably the best $16 we had spent on the trip. I’d recommend everyone to make this top, even if for an hour or two. Those who like to stop and take lots of pictures should plan for more like two or three hours… We had two hours and took a few hundred photos. The place is like a rain forest tucked away on a run-down island. It was a breath of fresh air, a well-maintained tropical paradise. They had waterfalls, flowers, lizards, birds and so much to see and take in.

Garden of the Groves

Garden of the Groves

Such a wide variety of flowers at Garden of the Groves.

Such a wide variety of flowers at Garden of the Groves.

Garden of the Groves

Garden of the Groves

Wildlife at Garden of the Groves

Wildlife at Garden of the Groves

I had been to the island before, although a lot had changed in the four years I’d been away. Maybe the newbie traveler in me had rose-colored glasses on the duration of that inaugural trip, or maybe the condition of the island has just gone downhill quite a bit in that time. It wasn’t quite how I remembered it, although it was still pretty magical.

I thoroughly enjoyed beach combing and having plenty to take pictures of. The forest and wooded areas on the island must have been damaged in a storm because they were pretty sparse. The snorkeling wasn’t as entertaining as I remembered it, having less to look at closer to the resort. Most of the homes were run down and needing work, some even needing doors and windows. It just seemed like very few of the citizens of the island took pride in their property or their possessions. We thought for sure we’d want to relocate to the tropical paradise, but five days was enough to open our eyes to how good we really have it back home.


Grand Bahama Island-West

23 Feb

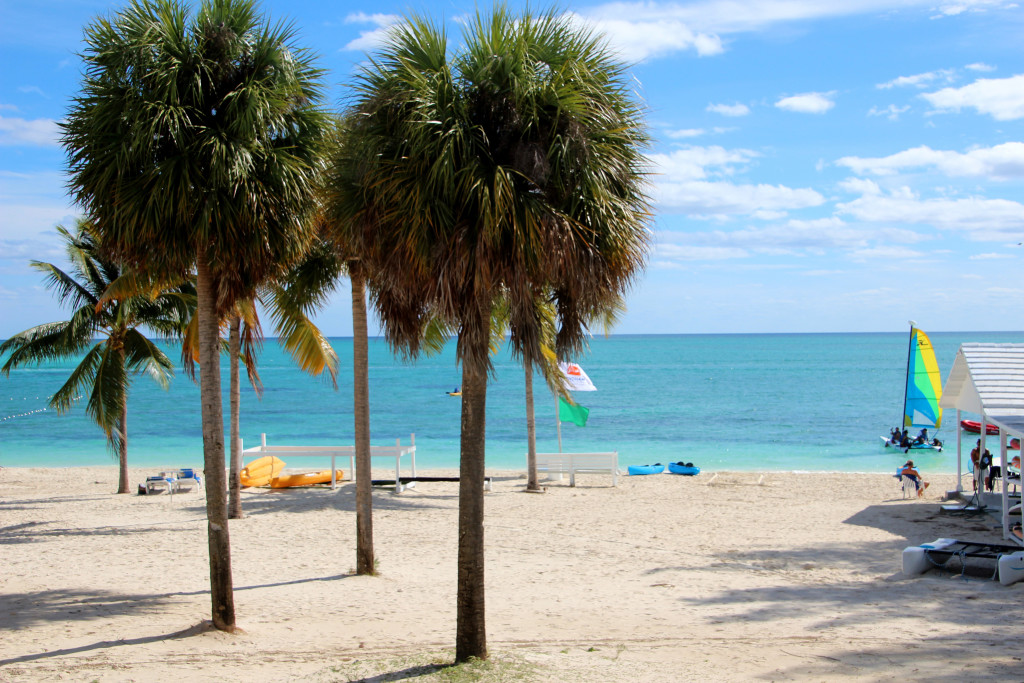
The view from our room on a bright day at the resort.

The view from our room on a bright day at the resort.

Note: This blog post is third of four about a visit to Grand Bahamas Island in January 2016.

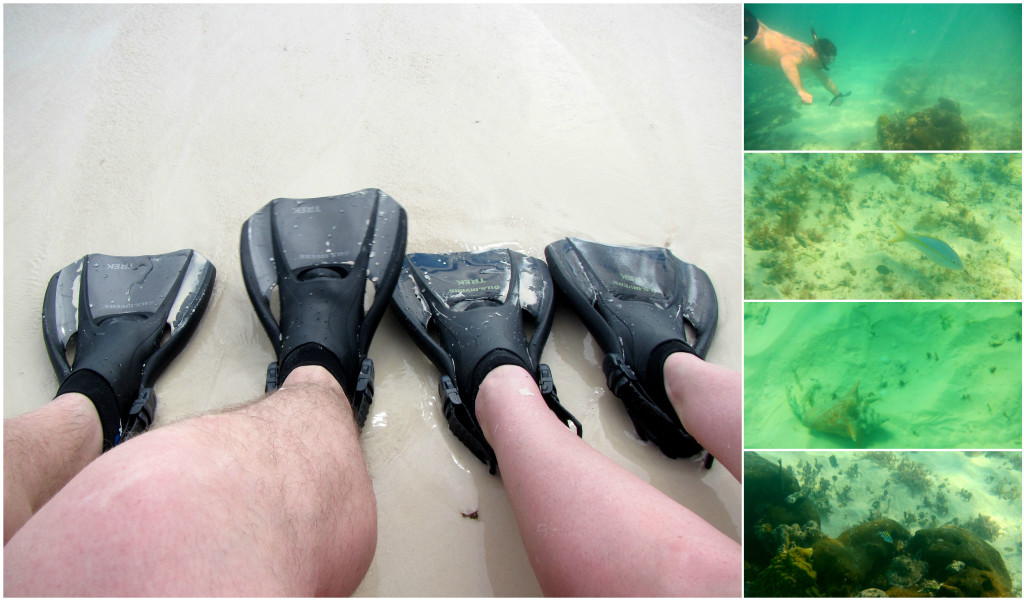
We tried our hand at snorkeling just to see if we would like it. We had some mixed reviews. We brought our own snorkel equipment so we didn’t need to rent any or worry about cleanliness. The downside was that Corey’s flipper wouldn’t stay latched on his foot. It was much more difficult that I remembered it being. We spent a lot of time fixing our equipment and not much time getting anywhere. I’m glad we decided to try it out at the resort instead of heading to another beach. After about two hours we were spent. We managed to find one rock with lots of fishies around it. We attempted to swim out to the coral reef 100 yards or so offshore, but it was high tide, so that distance wasn’t very easy to reach. The wind roughed up the water further from the beach, too.

Plenty to see snorkeling at the resort.

Plenty to see snorkeling at the resort.

After lunch we drove west, stopping at the Lucaya Marketplace first. It was a mad house. All of the vendors seemed to be selling practically the same exact items and they were adamant about getting you to stop in their little shop. We stopped in one and they wouldn’t stop talking, trying to pressure us into buying something. I know we’re two really nice people who hardly ever say “no,” but somehow we managed to walk out of there empty-handed. We skirted the rest of the shops and walked toward the main drag to get an idea of what else there was. They had some American shops (Harley Davidson) and some higher-end shops selling fancy jewelry and clothing. Nothing was tripping our fancy. I really wanted some sort of jewelry, but struck out. We took some pictures and got on the road again.

We drove through Freeport, which was a challenge mainly because of the poor driving habits of the locals. They knew where they were going and just went there, nevermind stop signs and traffic signals. Driving on the wrong side of the road was challenge enough in roundabouts, but add the locals cutting corners and cutting in… it was insane.

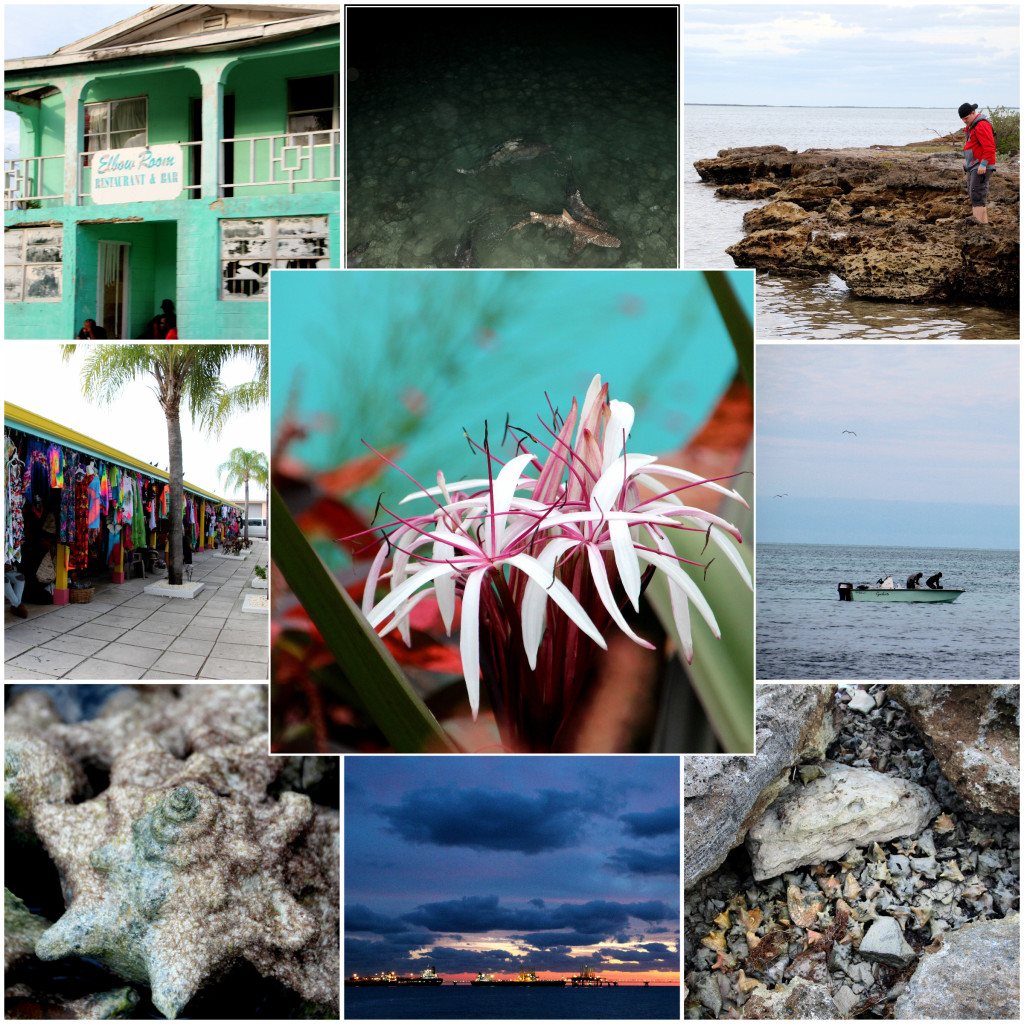
Scenes from the west side of Grand Bahama Island.

Scenes from the west side of Grand Bahama Island.

After driving clear to the far west side of the island, Corey and I decided to never recommend traveling to that part. We had people asking us for a ride, walking in the middle of the road and watching our every move. We were maybe the only tourists (Corey told me I shouldn’t say “white people” but that’s how it really was, we were the only white people) driving at the time… so we stood out. That side of the island also featured many, many, many more stray dogs. They seemed to be everywhere. Most of the businesses and some of the homes had bars on their windows, too. It really wasn’t a pleasant place to be. It got a little nicer closer to the end of the island, but not by much.
We pulled off the road at the shore near the far west end and got out to walk around before driving back through the chaos. We took some pictures and it took us a few minutes to realize that the rocky shore wasn’t really made of rocks. It was a dumping ground for old conch shells. They were everywhere, some covered in plant life, some still pink and shiny. Corey found a smaller one that looked nice and would travel better than the one he found the previous day at Pelican Point. I already had a conch from my previous visit to the island. As we drove back toward Freeport, we noticed more piles of conch shells, something we were oblivious to before that stop.

We ended the night with a struggle to find the Pier One restaurant. It was in the harbor, but without the Internet, we had to rely on some pretty crappy directions to get us there. We arrived just after sunset and it was absolutely beautiful. Huge ships went by frequently. We had a nice supper and were able to see the 7 p.m. shark feeding. The lighting wasn’t great for photos and the sharks were moving pretty quickly. They threw the fish parts over the balcony to the sharks swimming below. It was neat to see so many sharks in one spot out in the wild doing laps. The food and drinks were absolutely amazing. We highly recommend Mango Crab and Bahama Mamma rolls and the Shark Snap! drink.


Grand Bahama Island-East

22 Feb

Note: This blog post is the second of four about a visit to Grand Bahamas Island in January 2016.

We decided to rent a car to explore the island so we were a little more in control of our time and money (and sanity?). It was a beat-up Volkswagen Jetta, although we didn’t really expect much else as almost all of the vehicles on the island are in rough shape. The few exceptions belong to the wealthy property owners who likely have a little better sense about how to maintain a vehicle.

We headed east toward Lucayan National Park. We decided we would drive clear to the end of the road, as far as we could drive on the island. We ended up at a ferry landing at the end of a very rough gravel road. Since we had been in the car more than two hours, we got out and stretched our legs (and watching the fishies in the water) before the many photo stops on the way back to the resort.

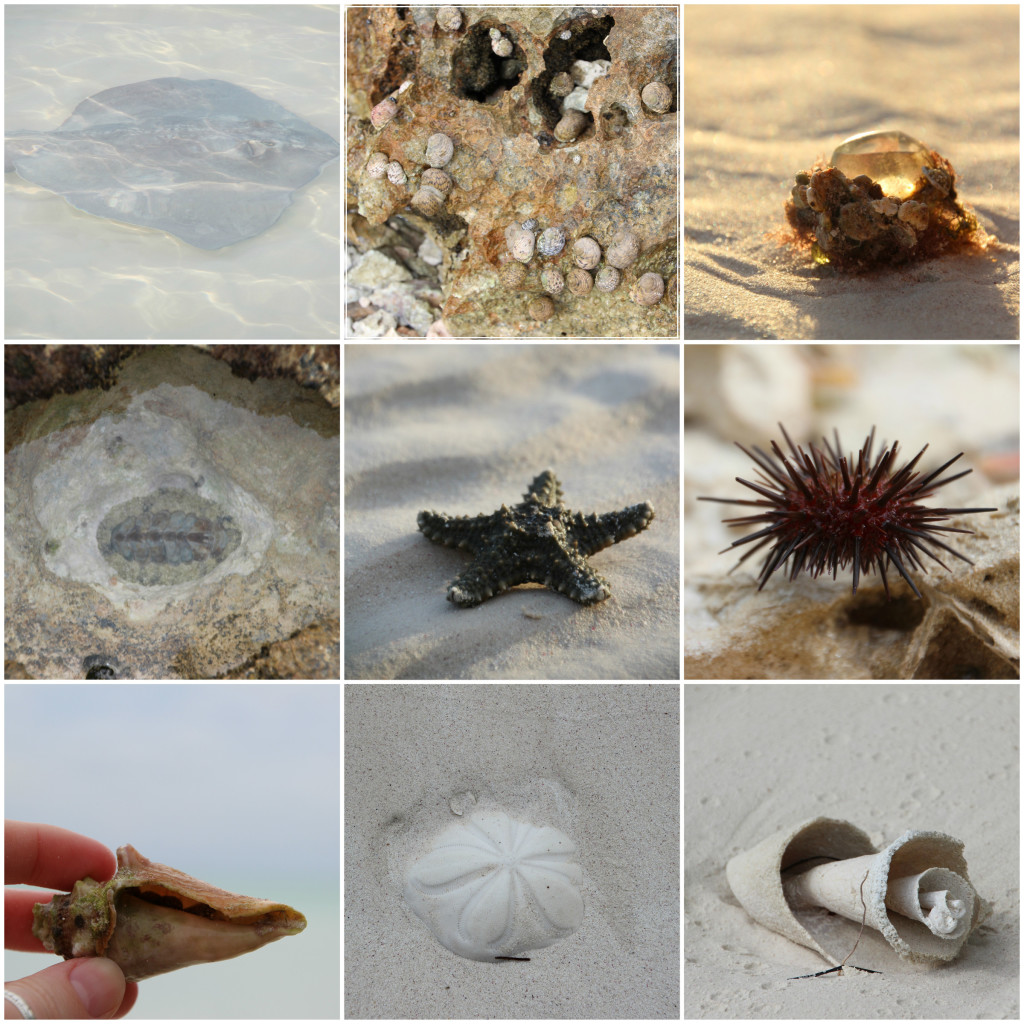
We stopped in McCleans Town briefly to photograph the boat landing, snail hotels and chitons.

A collection from the sea.

Then we stopped at Pelican Point for a much lengthier stay. Within the first few minutes at the beach, literally the first few steps on the sand, I screamed like a little girl because I was so excited to find my very own sand dollar. It was on my list of highly unlikely things I’d like to see/have from this trip. People claimed they were found all of the time, but I’d never seen one other than in the store. I added it to my shell bag and we combed the beach, dipping our toes in the water a bit, too. It was a beautiful beach and we had it mostly to ourselves since we were so far from any of the resorts.

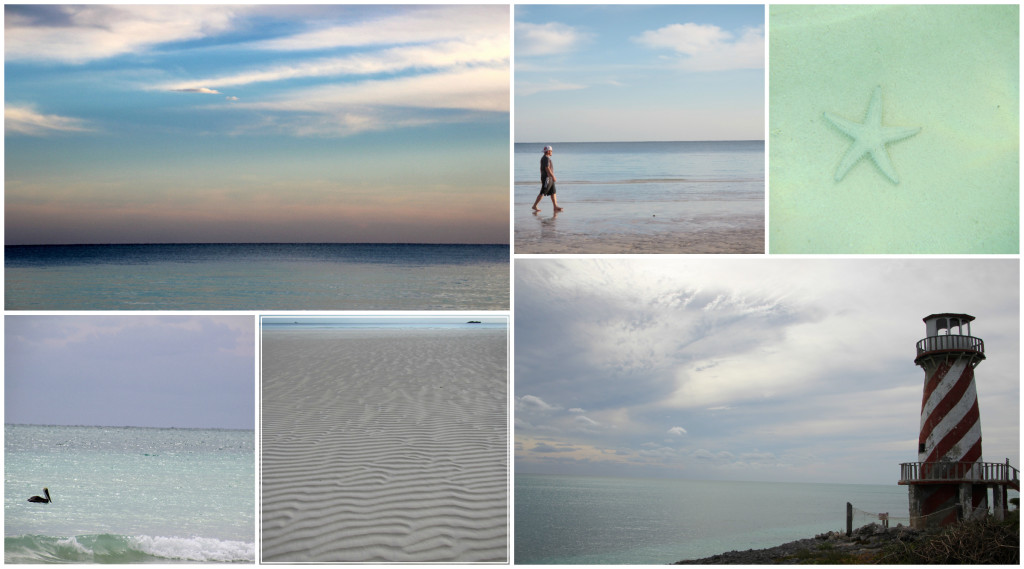
We left the highway in High Point to see the fake lighthouse that was built more as a decoration than a functional tool. We didn’t stay long at that attraction as the structure was in serious need of some TLC. I was more enthralled with the caves under the rocky shore. I could hear the water splashing underfoot. I bet it was a pretty sight from offshore.

We made it to Lucayan National Park around 2:30 p.m. and spent a solid three hours exploring. We actually spent a lot of our time in the caves. Corey loved feeding the fish. I remembered that there were fish to feed in the park, so I brought a loaf of bread from the cafeteria. He was thoroughly entertained. The water in the caves was so blue from the ocean and it was a little cloudy where the freshwater met the saltwater.

The caves at Lucayan National Park

Across the road, we made it as far as the bridge over Gold Rock Creek before Corey was entertained feeding the fishies. This time we were joined by some birds that wanted in on the action. They were practically eating out of our hands.

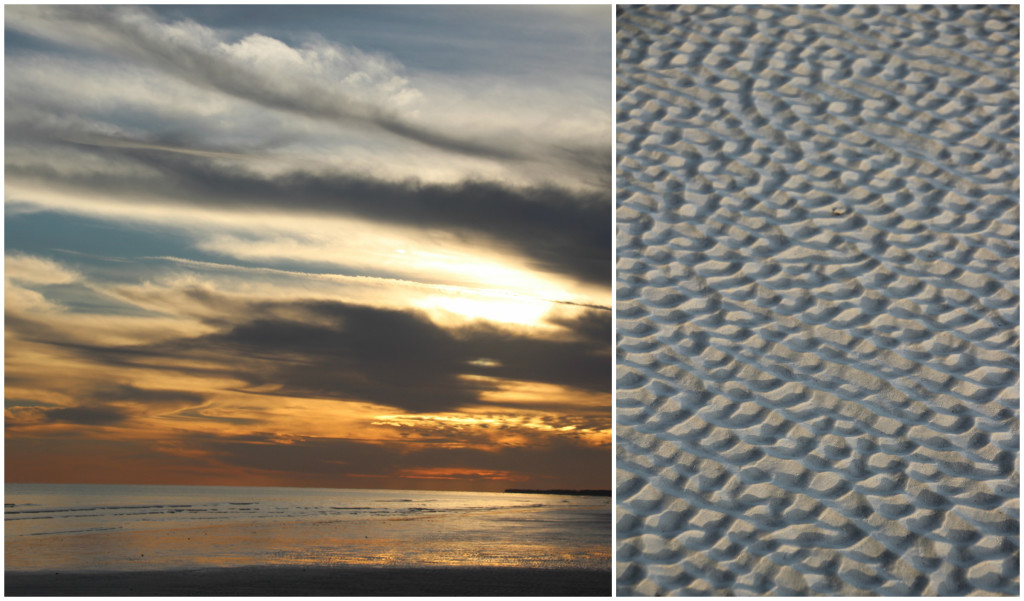
The beach wasn’t quite how I remembered it. The uprooted trees that were a focal point of many of my photos last time were gone, either removed by the park service or washed away by a storm. The beach was still amazing. It was extremely wide as we were there near low tide. The ripples of sand were mesmerizing. We waded as deep in the water as we dared; it was a little chilly yet and we weren’t so sure what would be lurking just out of sight. We walked in waist-deep water along the shore, taking pictures of the waves and the shoreline. Eventually we came across a sting ray in the shallow water. It saw us and moseyed into the deeper parts, which sent us into shallower water. I saw a starfish on the ocean floor and it was absolutely beautiful. I left it where it was but took many photographs of it. Somehow we saw the second sting ray, one that was the exact color of the sand, before we stepped on it. That was enough for us. We walked out of the water for the rest of the way. We didn’t need any injuries so far from the city and without any local experts nearby. We were literally alone on the beach with miles of sand and water all to ourselves.

Gold Rock Beach at Lucayan National Park

I spotted a dead (or possibly only dying) starfish washed up in the sand ripples closer to the tree line. It was definitely not in the same condition as the one I spotted in the ocean, so it came home with me. At sunset, we had the most beautiful view. A pelican even joined us just offshore. It is one of the most beautiful places I’ve ever been to.

Sadly, we had to rush back to make our dinner reservations at 7 p.m. at the resort. I wasn’t a fan of needing reservations for a restaurant while on vacation. That’s not how we operate. The food wasn’t even that great; we ended up hitting up the cafeteria after the restaurant for food that was a little more filling.

A collection of scenes from the east side of the island.


Grand Bahama Island

21 Feb

Note: This blog post is one of four about a visit to Grand Bahamas Island in January 2016.

Travel can be hard work—the long lines, constantly ignoring other people being rude, sitting in extremely uncomfortable positions for long periods of time and hurrying up just to wait—but most of the time your efforts are worth it when you reach your destination.

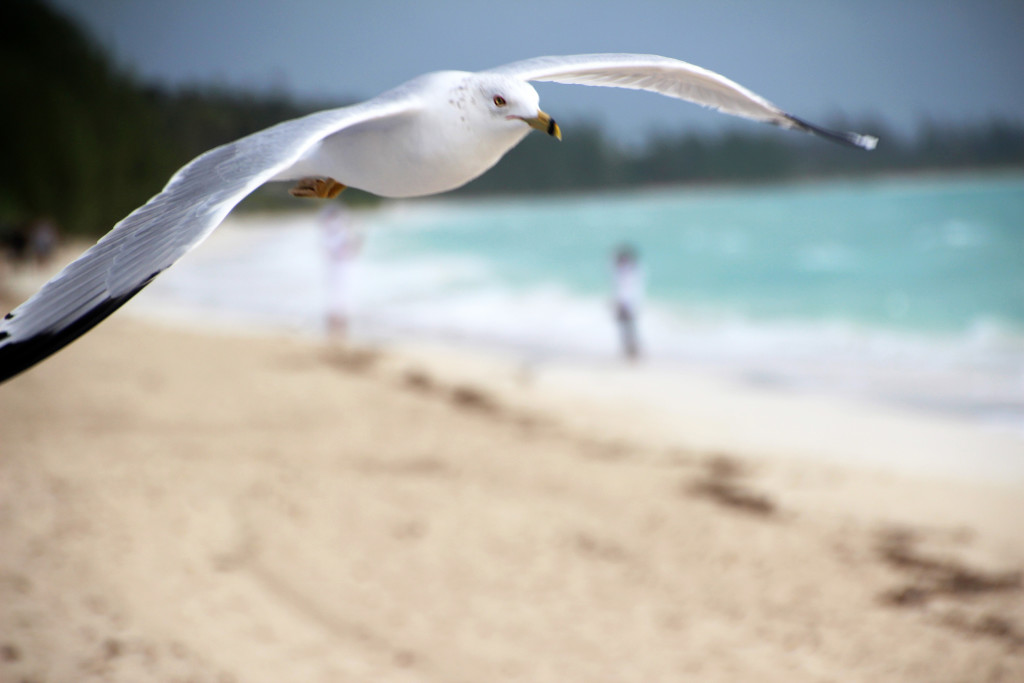
The photo bomber.

The photo bomber.

When we stepped off the airplane, our first steps in the Bahamas, the warmth put a smile on both of our faces. It was time to strip off the sweatshirts and warm up or winter skin. While others booked it into the terminal to work on getting out of the airport, we took our time, took some selfies and waited for the lines to die down.

Then the adventure started. As we exited the airport, we asked for a taxi and we were presented with J and his dilapidated version of a taxi. I knew not to expect the finest vehicle, but was hoping at least the door handles worked without some sort of magic trick. Alas, we had to wait to be let into the vehicle as well as to be let out of the vehicle. Ok, tolerable. But the driving antics of this “professional” left much to be desired. He was all over the road, even with oncoming traffic in the very near distance. There were several times that Corey looked at me with the “this guy is going to kill us” look, maybe even followed by a slightly different “what did you get me into?” look. The best I could do was plaster a smile on my face, ignore the terrible driving habits and try to think happy thoughts about the beautiful beach I couldn’t wait to explore at our resort. Later I found out that Corey had a better view of our driver and his broken steering wheel. I guess the thing moved in all sorts of directions—in and out, up and down, not just left and right.

The stormy shore

The stormy shore

The sun was out briefly as we meandered our way from the airport to the hotel, a 20-minute ride. We unloaded at the hotel around 1 p.m. and had two hours until we could officially check into our room. We left our bags at the front desk and headed for the bar. We grabbed our mojitos and walked toward the beach, getting the lay of the resort. The wind was absolutely terrible, blowing sand in our eyes and ears (what a feeling!). We weren’t exactly dressed for the beach, having flown out of Madison at 5:30 a.m. in below-freezing temps with some snow flurries.

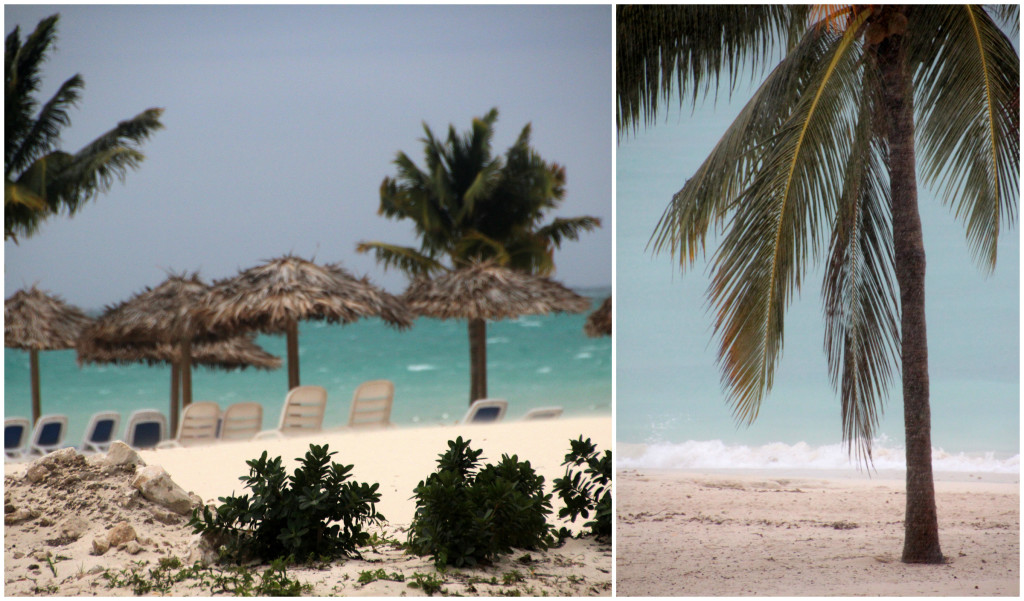
We were able to do a little shell collecting in the afternoon, after getting into our room, and were chased back to the resort by a storm cloud. The rest of the evening was rain showers or downpours off and on. The next day featured more of the same. We were able to roam the beach just in front of the resort before another storm rolled in. It was worth it; we found a great shell collection.

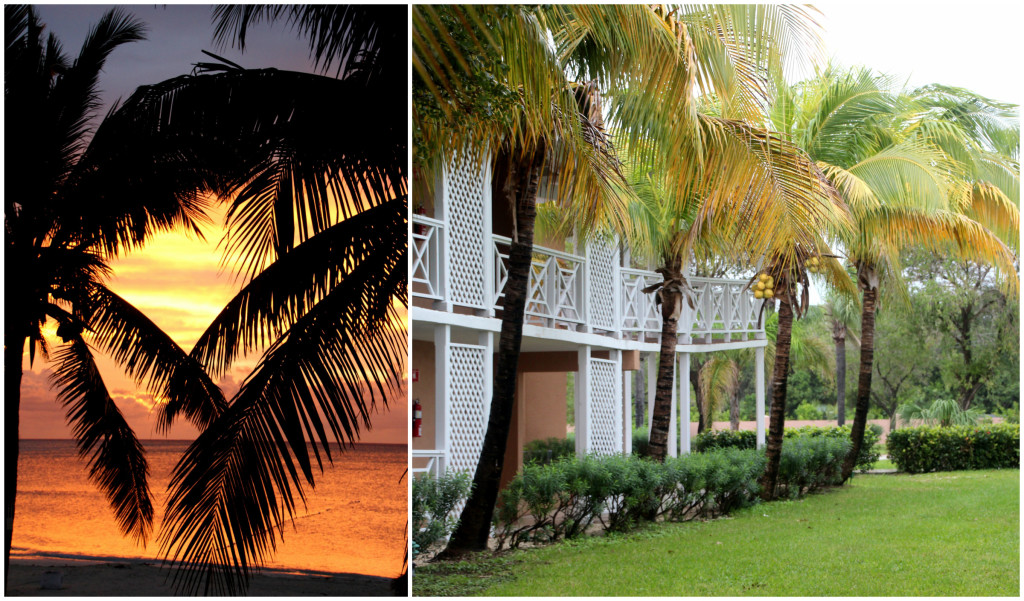
The hotel

The hotel


Good bye jungle

04 Nov

In his second attempt at growing a garden, my boyfriend, Corey, was even more successful than last year’s bountiful harvest. Lessons were learned, new ideas were tried and the outcome was phenomenal.

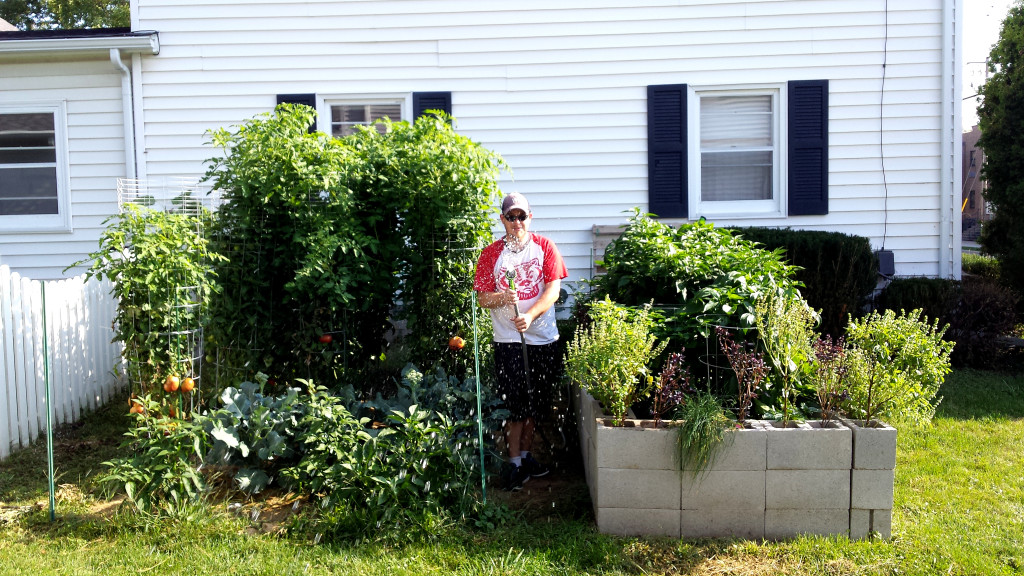
Corey manages the "jungle"

Corey manages the “jungle”

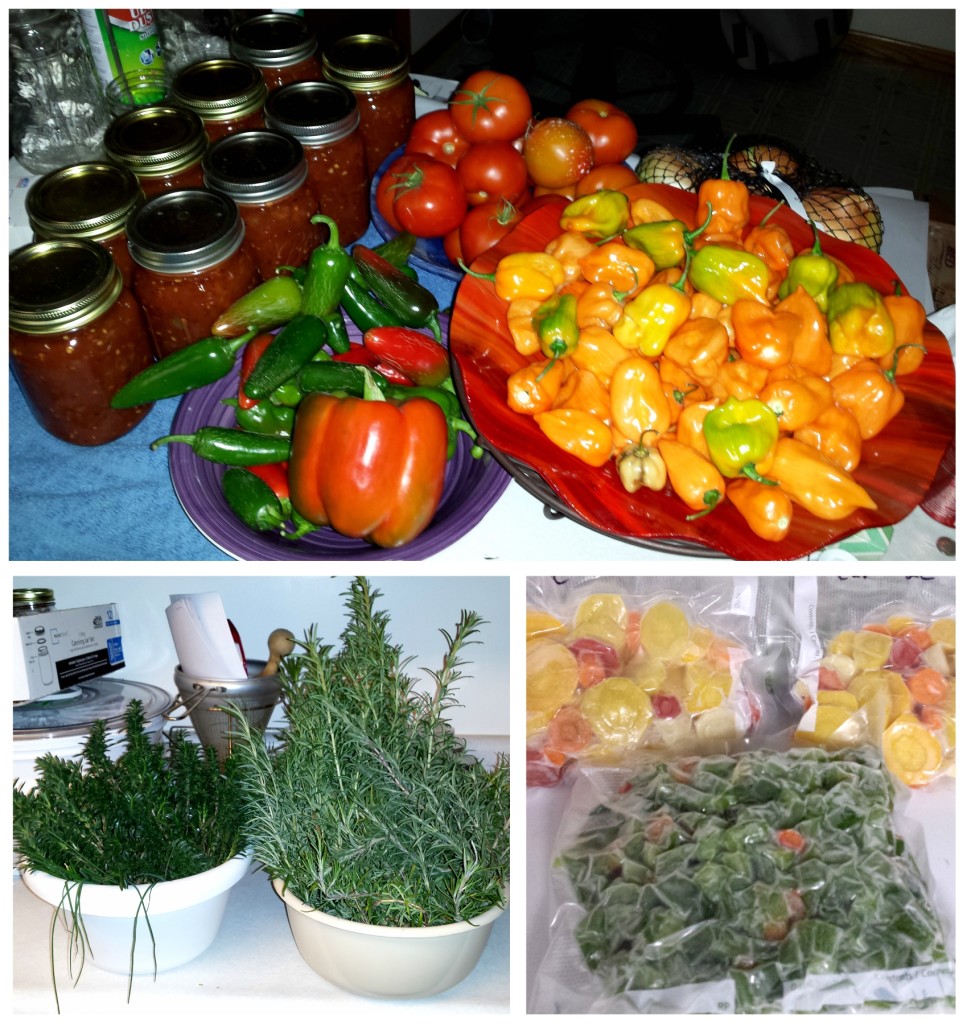
Last weekend he spent a couple of days removing the dead plants. We got a killing frost a couple of weeks ago, and he was able to harvest the unripe tomatoes, jalapenos, habaneros, bell peppers and herbs before the plants died. But, what do you do with so much produce that isn’t quite ready to use? We had carrots, broccoli, tomatoes, four types of peppers and a wide variety of herbs planted this year.

Corey's garden mid-season and after everything was harvested.

Corey’s garden mid-season and after everything was harvested.

Well, tomatoes will actually ripen in the basement (a room kept at approximately 50-65 degrees) as long as they’re in a single layer with green bananas nearby. It sounds weird, but I promise it works. I guess the bananas give off a chemical that helps ripen the tomatoes.

From barely green to completely ripe in approximately four weeks.

From barely green to completely ripe in approximately four weeks.

There were a lot of peppers left over. The jalapenos can be used when green. Corey made candied jalapenos with some and chopped, vacuum sealed and froze the rest. The bell peppers were chopped, vacuum sealed and frozen, approximately 20 cups worth! The habaneros were dehydrated. This was a task that needed to be done in a basement or room you don’t plan on being in for a while… the smell is a little overwhelming.

Five cups of dried habanero peppers, soon to be ground into a powder.

Five cups of dried habanero peppers, soon to be ground into a powder.

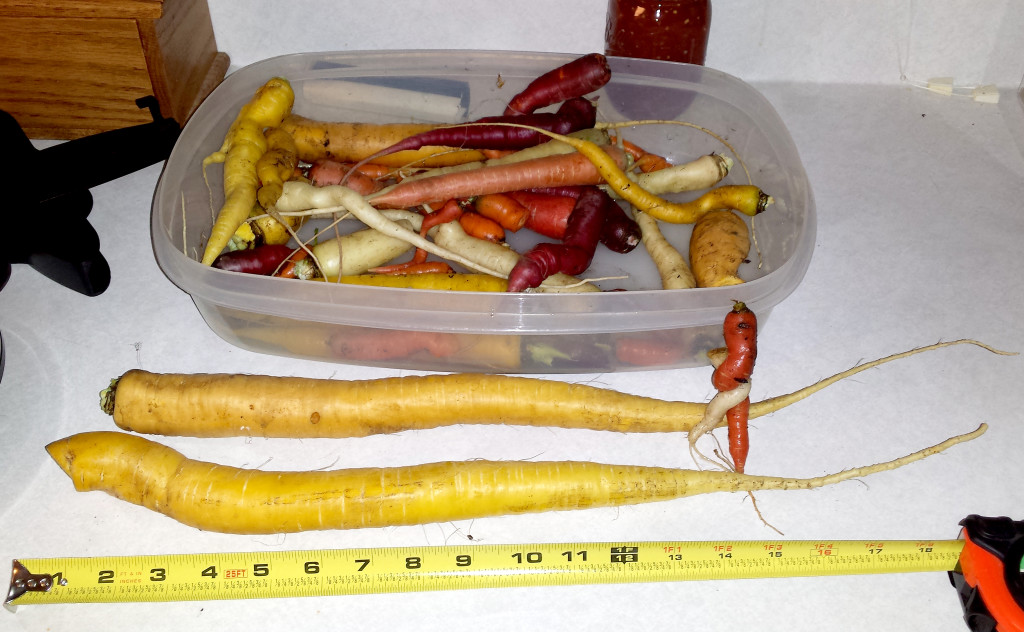
The carrots may have gotten a little out of hand. We planted them in the square openings of the cinder blocks and they really took off. Some got quite big… measuring more than an inch wide and 20 inches long. A few were intertwined. We chose the organic rainbow ones, so not all were orange. We had more yellow and white ones than orange. The red and purple were really neat, although they were orange once peeled.

A rainbow of color from this year's final carrot harvest.

A rainbow of color from this year’s final carrot harvest.

Even after the frost set in for a few days, the broccoli continued to ripen. Corey harvested what was remaining, approximately four cups once rinsed, steamed, vacuum sealed and frozen.

The bountiful harvest

The bountiful harvest

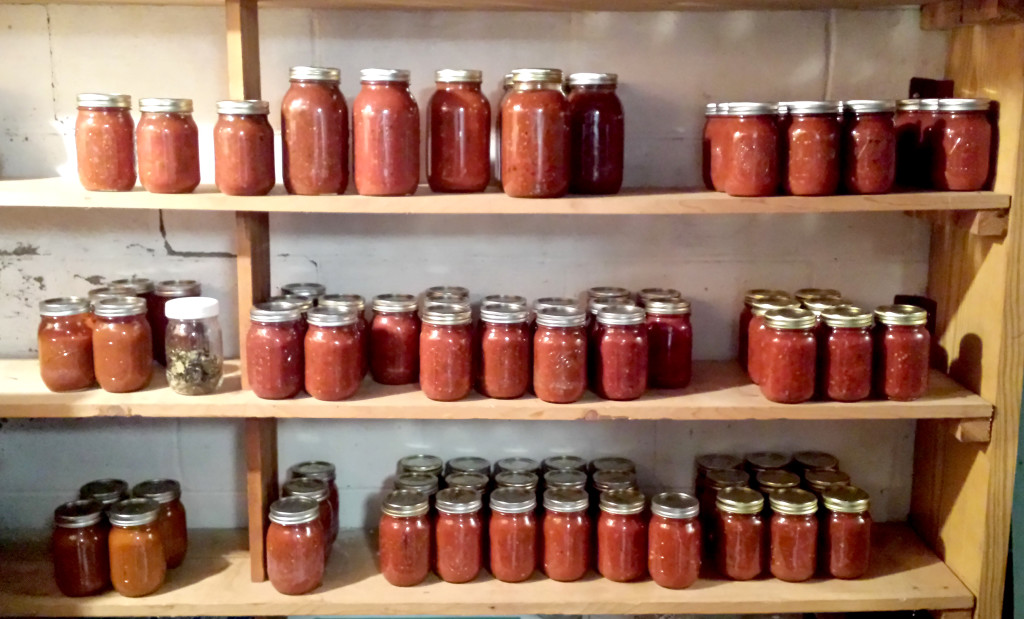
Over the last few months, Corey has spent countless hours canning a wide variety of food from the massive amount of tomatoes he harvested. He has pizza sauce, spaghetti sauce, chili base and bloody Mary mix. These likely won’t last the winter. He also has an impressive quantity of salsa in flavors such as “raspberry peach lime,” “strawberry kiwi,” “mango peach,” “apple strawberry,” “pineapple,” “apple cherry” and “blueberry.”

The top shelf is spaghetti sauce, chili base and bloody Mary mix; the second shelf is pizza sauce and salsa; and the bottom shelf is all salsa.

The top shelf is spaghetti sauce, chili base and bloody Mary mix; the second shelf is pizza sauce and salsa; and the bottom shelf is all salsa.

A garden isn’t just something that magically happens. It takes time, energy, planning and a lot of care. Corey and I spent a lot of time caring for the plants, watering every-other day, propping them up when they were too heavy with growing buds and eventually harvesting everything as it was ripening. The time and energy are worth it when you’ve got a freezer and pantry full of success.


Explore the World

25 Sep

There is so much to see; don't let it pass you by. Photo by Dee Harris

There is so much to see; don’t let it pass you by. Photo by Dee Harris